Thursday, 28 November 2013

First Jungle Scene Completed

Below is my first completed scene of my animation, I chose to complete this scene first as it is the longest (regarding animation) in the entire film, all of the scenes that will follow this one will be easier to animate as the shots are fairly simple and character movement is fairly minimal.

Click the video below to view my animation.


Wednesday, 20 November 2013

Updated Animated Test

Below is a video of my updated animation test, there is some more movement on  the adult gorilla and I have just begun to introduce the baby gorilla to the scene. Current frames: 51, I am beginning to find that animating my characters is going to take much longer than anticipated so I may have to alter my story line to allow the animating process to be completed on time I have 7 weeks from now to complete my 1:30min animation.


Sunday, 17 November 2013

Animation Test 

This video is of a quick animation test that will help me to decide if the character suites the environment and what style of animation to use. I am using flash to create the animated elements of the advert and photoshop for backgrounds and other elements such as foreground layers like grass etc.

Please click on the video below to view.


Gorilla Fine Art Study

Below is an image of a gorilla drawn in graphite pencil, I produced this piece of art to allow me to get a better knowledge of a gorilla's body form as well as understanding how the light casts shadows over the face so that I can apply this to my animated character.


Monday, 11 November 2013

Final Animatic

Click on the video to check out my final animatic.

Now that I have completed this I can now begin the animating process, as mentioned in the initial project document I need to have this project completed by the 1st of Jan 2014, wish me luck !


Storyboards

The images below are of my final storyboards. I have essentially plotted out my story in key shots to allow me to fully understand when I need to change my frames throughout the animation. Now that I have completed my storyboards I can now produce an animatic to help me time my animation as well as figure out where sounds should go. 

A few posts back now I posted up a rough animatic using the first of the two storyboards and hopefully you will be able to see the difference between this one and my new one in the next post.


Initial Storyboard

Final Story Board

Sunday, 10 November 2013

Final Gorilla Designs !

I've now come up with my final characters for my animation and so I will be able to start animation as soon as possible, from the below pictures you will be able to see the final stage of my ongoing developments thought this project.


These drawings are called character turn arounds, these images allow an animator to see clearly how the character should be drawn in its varying positions in an animation, they will allow me to keep the shape of the characters precise throughout the animation and they will also allow me to understand the anatomy of the characters a lot better. Every animator will produce turn around or character sheets to allow them to really understand their characters design and allow accurate animating.

Every character turn around should have an final sketch of the character and then from this image the turn around process can be easily completed, including front, back and side views, I suppose its a bit like modelling the character in 3D without the use of technology.

Friday, 8 November 2013

Panda Model

To get a better idea about how I was going to create another of my main characters, I decided to produce a 3D sculpture out of air drying clay so that I could gain a better understanding of how I was going to draw the character for the final designs.

Below are the images of my clay panda:


This model was painted using acrylic paints. I did a few shots of the model in my garden so that I could see if the colours that I had chosen to paint with would work with the greens and yellows of the jungle in my animation.


First Animatic and Storyboard

First Animatic and Storyboard

In any animation a storyboard is essential yo allow the animator to create a piece of animation as successfully as possible as well as ensuring that the story makes as much sense as possible to allow the viewers to connect to it.

Below is my first animatic and story board for my WWF advert.


As you can see some of the frames in this animatic are very quick and rough, as it is only an initial animatic I can now develop this one so that it looks a lot nicer and easier to understand making the story as clear as possible.

I will be posting up my updated version in the next few day and so hopefully you will be able to see a huge improvement from this one.
Backgrounds Complete !

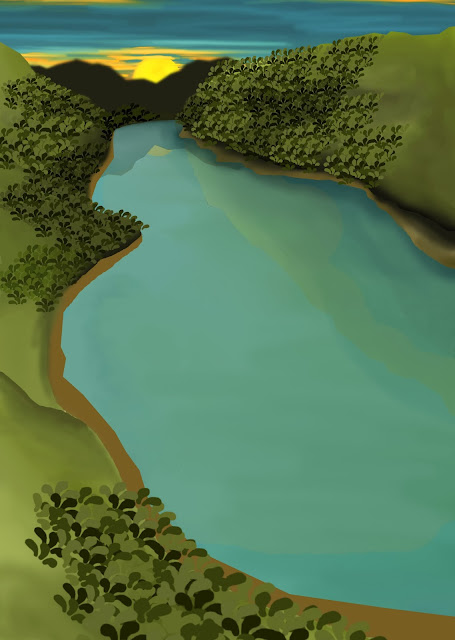
I have just finished my last background for my animation, as you can see it does appear to be incomplete, but it looks like this for a reason. As the camera in this first shot is going to pan over the water into the distance I had to increase the size of the document so that there is enough space for the camera to travel and move. 

It will imitate the movement of a helicopter banking with the bends in the river and so because of this I didn't have to fill in all of the areas of the image as the camera will not see these specific out of shot zones and therefore will save me some valuable time!


I have tried to keep the style of this image similar to my other backgrounds however I feel that the style of this image has differed slightly. Now that all of the images have been completed are can start about designing my last characters as well as animating my short film. I will also be animating over the water in flash to really bring it to life.

Visual Research: Howletts Wildlife Park Visit

A few weeks ago now I went on a little trip down to Kents, Howletts Wildlife Park. As this zoo has the worlds largest captive collection of gorillas I felt that I had to go, to get all of the essential footage and photography I needed for reference in my final animation. 

Upon arrival the Gorillas were pretty sleepy and so we left for some lunch and upon our return they had all sprung to life and were performing acrobats, swinging on ropes and best of all play fighting. 

This was great to watch as I could see the bond between the animals and how they interact with one another. I will be paying close attention to these actions with my two gorilla characters, (mother and child) so that I can show the importance to protect these animals, not only because they are becoming extinct, but also because each death of a gorilla is breaking a bond with another, much like how we would be distraught if one of our family were to suddenly be taken from us. 
It was clear that the animals had the same emotions us and so I think this shows that they really aren't at all different to ourselves.

Below are some pics taken from the day:


It is very clear to see the resemblance between gorillas and humans, they have all of the same features as ourselves, as well as the emotions we have between one another. From the images I can really develop/enhance my previous characters which can be seen a few posts back.

Thursday, 7 November 2013

3 Down 1 To Go!

Another one of my backgrounds has now been completed, this was by far the hardest one to design and draw as the perspective of the camera is quite unusual, I think that I have managed to keep the style flowing through all 3 designs so at the moment I am happy with what I have produced. 

The below images are of both my initial concept idea as well as my final background design, as said in the last post have a look back at the development from my initial ideas to my finalised designs.

1: Initial


2: Final


Tuesday, 5 November 2013

Final Background 2


This is another one of my finalised backgrounds, as you can see I have managed to keep the style flowing between this background and the previous background which can be seen in the last post. Please leave a comment and let me know what you think about my work so far, it would be really helpful to have some constructive criticism from a different audience.

I have used my research document to design these backgrounds ensuring that I use foliage relevant to the congo jungle.

Monday, 4 November 2013

Final Background


This is one of my final backgrounds for my animation, I created it using photoshop with a variety of different brushes. I think that I have managed to create a stage that will compliment my character's performance, the colours have been carefully chosen as well as foliage to make the scene look as real to life as possible. 

To ensure that my animation has smooth flowing transitions I must ensure that I include the style in my other backgrounds. I will also need to ensure that the characters fit in with this style so that they don't look out of place.

This image has been developed from the the previous background drawings which can be found in my previous posts.

Keep looking out for some more background developments in the next few days!
Initial Panda Digital Drawing

This image is of the panda that will be in my animation, the reason for its design is because I wanted the style to be fantasy. The panda is called King and is protector of the forest symbolising the WWF's efforts to protect the animals that are becoming extinct. He is a cute cuddly panda bear but when he is confronted with conflict then he can turn into a raging force that won't ever back down until the culprit, in this case a poacher, has been defeated.


More panda sketches will be posted up soon as well as further character developments for both King and Darwin and final background designs.

Saturday, 2 November 2013

Gorilla Models

To allow me to develop my character designs I produced some clay models to allow me to fully understand the anatomy of the bodies that I will be animating, below are some images of my gorilla model, I decided to call him Darwin as I thought the name was quite fitting for a primate, I also think the name gives him a personality too and I think this would be intelligent and wise, as well as trying to represent a characters personality, another reason why I chose to create 3D model versions was so that the project became that much realer as the physical object could be interacted with, and now has a presence that I can keep on referring to if need be. 


These models were created using air drying clay and supported by a wire coat hanger skeleton. To finish off the model I painted it using acrylic paints, I also used wood glue on the mushrooms to create a slime effect to bring some more realism to the model, this was a last minute experiment that thankfully gave the desired effect. 

Friday, 1 November 2013

New Gorilla designs !


Here are some more initial designs for my gorillas, as you can see I have now begun developing body shape to allow me to understand the form of my characters. The standing gorilla is made up of 4 main circles: Head, Chest, Belly  and Bum, these shapes will make it easy for me to animate and will also allow the reproduction of the character much easier to understand and in proportion.


I thought about playing about with the characters facial expressions as well as their head shapes and designs to see what types of characteristics I could give them, as you can see from the bottom design the gorilla has a large quiff hence the name elvis. However I believe that having a design that doesn't look natural detracts from the overall aesthetic that I am aiming to achieve.